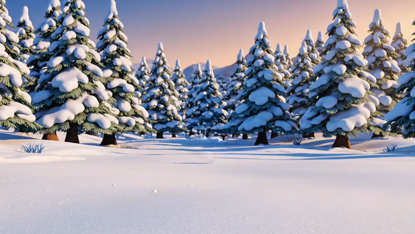
Window projection setup: Your window as a canvas — step-by-step to the perfect Christmas projection
Window projection setup makes holiday decorating feel like a weekend project you can actually finish. If you have a decent window and a spare evening, you can create a glowing scene that looks great from the street. Window projection setup gives you flexibility. You can change the image, try animation, or swap themes without ladders or sticky tape on the glass. The basics are simple. Choose the right film, pick a projector with enough brightness, and work out the distance from the lens to the glass. Then think about power and weather. In Ireland, light levels and dampness matter. Window projection setup needs planning for rain, condensation and early nights. Keep the projector dry and the cables tidy. Start small and scale up. Use a single pane and a short clip-on mount at first. Test in daylight and then at dusk. Window projection setup shines best when you match projector brightness to the view from outside. Go too dim and the image disappears. Go too bright and you waste money and create glare for neighbours. With a bit of practice you’ll get crisp colours and confident placement. The rest of this article breaks the process into clear, friendly steps to help you succeed.
Choosing the right projection surface and film
Window projection setup starts with the surface. Not every window behaves the same. Single-pane glass, double glazing, and treated glass all scatter light differently. For the cleanest result, you want a surface that reflects the image back toward the street without too much diffusion. The easiest option is a removable rear-projection film. It clings to glass and gives a matte, slightly diffusing surface that improves contrast for viewers outside. Window projection setup works well with cling films rated for rear projection. They come in various gains; a gain of 1.0 to 1.5 is a safe choice for home windows. If you prefer something subtler, a thin frosted spray or spray-on retrofit film can provide a uniform surface. Window projection setup with permanent frosted glass is more durable but needs careful planning before application. For quick setups, a white blackout sheet taped behind the window can work indoors if you can keep it taut. In terrace houses or flats, think about privacy. Window projection setup can be reversible. Use static cling films so you can remove them after the season. Also consider the size and shape of the pane. Large bay windows may need multiple projectors or a very bright single unit to cover evenly. Window projection setup will be easiest when you measure the glass first and match the film size to the area you want to light up.
Selecting a projector: brightness, throw, and form factor
Window projection setup depends heavily on choosing the right projector. Brightness is the most visible factor. For street visibility in early evening, aim for at least 2,000 lumens for small windows and 3,000–4,000 lumens for larger displays or brighter streets. Window projection setup can succeed with compact, battery-powered projectors for small panes, but for clear colours and crisp detail you’ll usually want a mains-powered unit. Throw distance matters. Measure from the intended projector position to the glass and check the throw ratio of the projector. Short-throw models let you place the projector close to the window and still fill the glass. Window projection setup is simpler with short-throw projectors if you have limited space. Consider resolution too: 1080p is a sweet spot for Christmas visuals—sharp enough for text and detailed images without the cost of 4K. Window projection setup also benefits from projectors with keystone correction and lens shift. These features let you fine-tune the image without awkward mounting. Noise and heat are practical concerns. Choose a quiet model if the projector will be in a living area. Window projection setup is often done inside a cold home, so avoid projectors that run extremely hot or need heavy ventilation near curtains and film. Finally, think about connectivity: plug-in USB sticks and HDMI from media players, plus simple Wi‑Fi streaming, make content changes easy for seasonal swaps.
Measuring distance, alignment and image scaling
Window projection setup needs a little math up front. Measure the glass width and height that you want to light up. Then measure the distance from the projector position to the glass. Most projector manuals include a throw chart. Use the chart to pick lens and zoom settings that match your measurements. Window projection setup becomes predictable when you work with the throw ratio: divide the throw distance by the image width to get the ratio. Use that to check which projector models will fit your space. Placement is important. Mount the projector on a low shelf or a small tripod behind the viewer, or place it near the window frame where it won’t obstruct walkways. Window projection setup is easier if you avoid extreme angles. If you must angle the projector, use keystone correction sparingly—digital correction can soften details. Window projection setup can also use multiple projectors for very wide bay windows. In that case, overlap edges slightly and blend them with soft content or masks to hide seams. Always test with the final media. Bring the projected image up to the glass at night and evaluate from the street. Adjust zoom, focus, and angle until the image is sharp and fills the intended area. Small changes in tilt and height can dramatically affect the perceived brightness and shape.
Content, brightness tuning and visibility tips
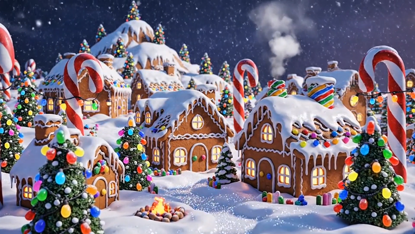
Window projection setup shines when the content is chosen for outdoor viewing. High-contrast graphics, bold colours, and large elements read better through glass and at distance. Avoid tiny text. Use simple animation or looping scenes that repeat every 30–60 seconds. Window projection setup works best with content that accounts for ambient street lighting. Increase overall brightness or use higher-contrast palettes near bright street lamps. Test the scene at different times. Early dusk and late evening can look quite different. Window projection setup also benefits from timed schedules. Use a smart plug or the projector’s internal scheduler to switch the show on at peak viewing hours and off late at night. That saves power and keeps neighbours happy. For Irish conditions, be mindful of reflections inside the room. Draw curtains behind the projector film or use a dark backdrop to minimise internal reflections. Window projection setup can include simple blackout curtains or fabric panels fixed behind the glass. If you expect heavy rain or condensation on the outside of the window, design content with darker borders so streaks are less visible. Finally, run a few test rotations to confirm comfort with brightness and content. Ask a friend to view from different angles to check legibility from the street and pavement.
Safety, installation and winter-ready practicalities
Window projection setup should be safe and compliant with your home layout. Secure cables along skirting boards with clips or cable covers. Keep power supplies elevated and away from damp floors. If you mount a projector near the window, ensure it sits on a stable shelf or bracket. Window projection setup needs ventilation. Don’t block exhaust vents with curtains or film. For long runs, use low-voltage extension cords rated for indoor use. In Irish winter, protect the projector from damp air by adding a thin weather barrier around the window frame inside, but never trap heat from the projector. Window projection setup that runs for hours benefits from a short daily cool-down break. Also check local regulations for displays if you live on a busy street; avoid flashing lights that might distract drivers. Window projection setup can include an outdoor-rated cover if part of the kit sits near open windows. Finally, test for heat near curtains and keep a smoke detector nearby. With these simple safety checks you can enjoy a festive window display that is striking, durable, and neighbour-friendly.
Popular projections