Home christmas projection – How to build your cozy mini Christmas cinema at home
Home christmas projection is the simplest trick to change a room or a garden corner into a cozy holiday stage. Start small and think like a host. Pick a spot that is visible from where people sit. Pick a plain wall or hang a light sheet. Make sure the surface is flat and not glossy. Light colors show images best. Dark stone or heavy textures break up the visuals. Measure your distance so the image fits the wall. Put the projector on a stable table or use a small mount. Power and cables need tidy routing. Tuck cords away to avoid trips. If you plan to use an outdoor projector, protect its plug and keep it off wet ground. For indoor setups, check lamp brightness and vents. Keep furniture clear so the image is not blocked. Test the placement in the evening. Small moves make big differences. Try the projector a few metres closer or further. Walk around the room to check sightlines. Ask a friend to sit where guests will sit. Adjust until the picture reads well and the light lands where you want it. A short rehearsal helps you feel confident.
Choose the perfect wall and layout
Home christmas projection helps you decide the best wall and the best view in seconds. Think about the kind of scene you want and how people will move. Place the seating so most faces are toward the wall. Avoid placing the projector where people will block it when they move. If the wall has windows, cover them with thick curtains for better contrast. Outside, pick a wall free of wall lights that could wash out the image. You can use temporary screens too. A white sheet or a frosted shower curtain can be a great screen. Attach it flat and tight to avoid ripples. Create a soft buffer zone in front of the screen by arranging a low couch or cushions. Use rugs to define the mini cinema area. Keep foot traffic to the sides, not through the projection beam. For garden shows, place seating on a slight incline so everyone can see. If you have a short time window for the show, make it easy to set up the same way each time. Mark the projector spot with tape so you can repeat the perfect throw distance quickly. If kids are around, put the projector out of reach and cord-cover the floor. These small steps make the atmosphere feel curated and relaxed.
Decorate the scene for warmth not showiness
Home christmas projection should always focus on cozy mood over flashy effects. Soft textures and warm colours support the image. Place candles in safe holders around the room. Use fairy lights with warm white bulbs to add a gentle glow. Layer blankets and cushions in reds, greens, and neutral tones. Add a few simple props by the screen to give depth. A wooden crate, a small ladder with wrapped boxes, or a vintage sled can frame the image. Keep items low so they do not cast unwanted shadows on the projection. For outdoor setups, use lanterns on either side of the screen to create a balanced scene. If you want seasonal plants, pick hardy evergreens that can stay outdoors. Use weatherproof fabric to cover seating if rain is possible. Less is more when it comes to decor. Let the projection be the main attraction and use props to complement it. If you include photos or family images, place them close to where people will gather so they can be seen up close. Arrange a small hot drinks station nearby. A tray with mugs, a thermos, and some biscuits invites people to linger. That small hospitality makes the whole event feel like a personal screening, not a tech demo.
Get sound right without overcomplicating things
Home christmas projection benefits hugely from good audio that does not shout. Start by choosing a playlist or a short soundtrack that supports the visuals. Keep the volume warm and soft. Place speakers where the sound can fill the seating area evenly. Small Bluetooth speakers work fine. If you use a projector with built in audio, test if the sound is clear from all seats. You might prefer a pair of compact speakers placed on either side of the screen. Use low stands or crates so the sound reaches the listeners and not the ceiling. If you have children or neighbours, respect quiet hours and consider lower volume levels. For outdoor shows, wind can wash out audio. Move speakers closer to the seating area and shield them from wind with simple boxes. Use short crossfade transitions between tracks to avoid abrupt changes. If you plan to add narration or a little live reading, practice the timing in advance. A small wireless mic can help but is often not necessary for small groups. Finally, create a short running order for the evening so you and any helpers know when to change scenes or bring out props. This keeps the vibe smooth and unhurried.
Simple show ideas and pacing for maximum atmosphere
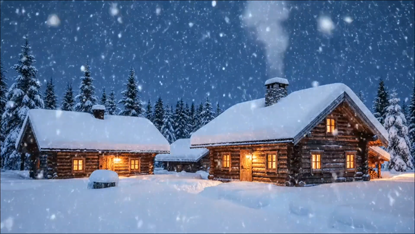
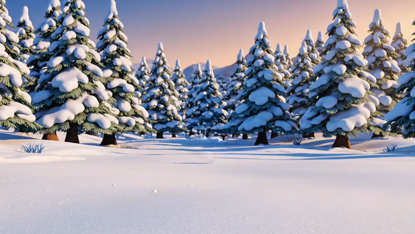
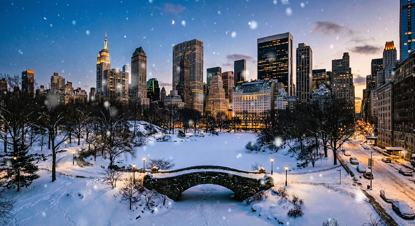
Home christmas projection is perfect for short themed loops and story moments. Pick three to five scenes and keep each one short, about two to five minutes. Start with a gentle introduction scene with falling snow or a slow wreath animation. Then ease into a heartwarming loop like a fireplace animation, soft falling snow over a village, or playful reindeer silhouettes. End with a warm closing scene and a call to grab a hot drink and chat. Use slower motion and long fades to make transitions feel natural. Let the music breathe between scenes. If you want variety, mix still images with subtle movement. Family photos can appear in the middle of the show, framed by twinkling lights. Add a simple countdown or a brief message at the end to invite people to the next moment, like carols or a small gift exchange. If you are outside, keep show lengths a bit shorter to avoid cold. Rotate guests through the seating so everyone has a good view at least once. Photograph the setup so you can repeat the layout next year. Share a few behind the scenes shots to inspire friends and neighbours. The goal is to make the night feel intimate and remembered.
Popular projections